Everything You Need to Know
The gap between a decent homemade chicken wing and a great one is smaller than most people think. It is almost entirely down to a handful of technique decisions that, once understood, make all the difference. This guide covers everything — from sourcing and preparation through to cooking methods, marinades, and finishing touches.
By the end of this, you should be able to produce wings at home that compare favourably to restaurant versions. Which is a genuinely useful skill to have.
Starting Right: Buying and Preparing Your Wings
Which Chicken Wings to Buy
In UK supermarkets, chicken wings are typically sold either whole or pre-split into drumettes (the section that looks like a small drumstick) and flats (the middle section with two bones). For home cooking, pre-split wings are more practical — they cook more evenly and are easier to eat.
Look for wings with good skin coverage and no obvious tears. Damaged skin tends to curl and dry out during cooking, leaving you with uneven results.
The Most Important Step: Drying Your Wings
Here is the single most impactful thing you can do to improve your homemade wings: dry them thoroughly before cooking. Pat them dry with kitchen paper, then leave them uncovered on a wire rack in the fridge for at least two hours, or overnight if you have time.
The science behind this is straightforward. Water on the surface of the skin steams as it heats, which prevents browning and crisping. Dry skin, by contrast, browns quickly and evenly. A batch of wings that has been properly dried overnight will be significantly crispier than a batch cooked straight from the packet, even using exactly the same technique.
If you are adding a dry rub or spice blend, apply it before the fridge rest. The salt in most rubs will also draw out additional moisture from the skin, amplifying the effect.
Cooking Methods: Fried vs Baked vs Air Fried
Deep Fried Wings
Frying produces the crispiest wings with the fastest cooking time, which is why it remains the method of choice in most restaurants. The key variables are oil temperature and not overcrowding the fryer or pan.
Oil temperature should be around 175-180°C. Below this and the wings will absorb too much oil and the skin will be greasy rather than crisp. Above it and the outside will colour too quickly before the meat is cooked through.
Fry in batches. Adding too many wings at once drops the oil temperature significantly, leading to uneven cooking. Each batch should take around 12-14 minutes for properly dried wings.
If you want to get closer to the double-fried Korean technique at home, fry the wings at a slightly lower temperature (160°C) for 10 minutes to cook through, then rest for a few minutes and fry again at 180°C for 3-4 minutes to crisp the skin. The second fry also evaporates any remaining moisture under the skin, producing an extraordinary crunch.
Oven Baked Wings
Oven wings can absolutely achieve excellent results, but they require a specific approach. The standard mistake is to place wings directly on a baking tray — the underside steams rather than crisping, leaving you with a wing that is crisp on top but flabby underneath.
Always use a wire rack set over a baking tray. This allows hot air to circulate around the entire wing, producing even crispiness on all sides.
Temperature: high heat is your friend. 220°C (200°C fan) for around 40-45 minutes, turning once halfway through. If you have a grill function, finishing under the grill for 3-4 minutes at the end adds colour and caramelisation that the oven alone cannot quite produce.
Baking powder is a much-discussed trick among home cooks, and it genuinely works. Adding a small amount (roughly half a teaspoon per 500g of wings) to your dry rub raises the pH of the skin surface, accelerating browning and creating a finer, crispier texture. Use plain aluminium-free baking powder to avoid any off flavours.
Air Fryer Wings
Air fryers have changed the home wing game considerably. They produce results much closer to fried wings than oven baking, in less time, and with no oil. For a weeknight batch of wings, an air fryer is hard to beat.
Temperature: 200°C for 20-25 minutes, shaking the basket halfway through. Do not overcrowd — if your air fryer basket is full, the wings will steam rather than crisp. Two rounds of smaller batches beats one overcrowded round.
One practical limitation: air fryers typically have a smaller capacity than an oven, which makes them less practical when cooking for larger groups.
Marinades and Rubs: Building Flavour
Dry Rubs
A dry rub applied before the fridge rest is the most reliable way to build deep flavour into a wing. Here is a versatile base that can be adapted in multiple directions:
- 2 tsp smoked paprika
- 1 tsp garlic powder
- 1 tsp onion powder
- 1 tsp ground cumin
- Half tsp cayenne pepper (adjust to taste)
- 1 tsp fine salt
- Half tsp cracked black pepper
- Half tsp baking powder (for baked wings)
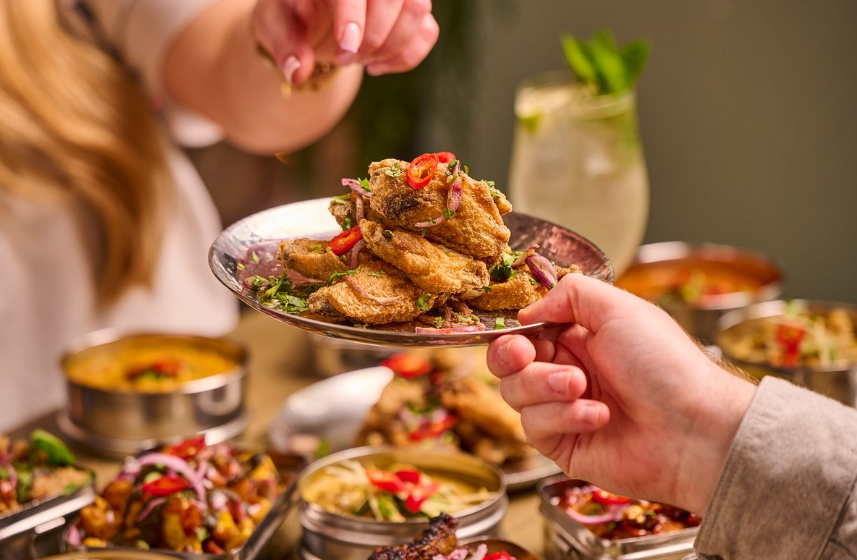
For a South Asian-inspired variation, replace the smoked paprika and cumin with chat masala and add a pinch of amchur (dried mango powder) for tartness. Finish the cooked wings with fresh coriander and finely sliced red onion.
Wet Marinades
Wet marinades work best when you have time — a minimum of four hours, but overnight is significantly better. The acid component (yoghurt, citrus juice, vinegar) tenderises the meat slightly, while the oil helps to carry fat-soluble flavour compounds into the flesh.
A simple Indian-inspired marinade: full-fat yoghurt, ginger paste, garlic paste, Kashmiri chilli powder, ground coriander, a squeeze of lemon, and salt. Coat the wings thoroughly, cover, and refrigerate overnight. The yoghurt base also helps the marinade adhere during cooking rather than sliding off.
Important: always pat wings dry after removing from a wet marinade and before cooking. The goal is flavour on the flesh, not excess moisture on the skin.
Finishing Glazes
A finishing glaze is applied after cooking — either by tossing cooked wings in a sauce or by brushing during the final few minutes of cooking. This is how you achieve the sticky, lacquered look that restaurant wings are known for.
For a sticky molasses glaze: combine treacle, a small amount of butter, garlic, a pinch of cinnamon, and a splash of apple cider vinegar in a small pan and reduce until thickened. Toss freshly cooked wings in this mixture while they are still hot.
The key is to apply the glaze and then return the wings to a hot oven or grill for 3-4 minutes. This sets the glaze and allows it to caramelise slightly, giving it that restaurant-quality finish.
Dipping Sauces: The Right Accompaniments
A dipping sauce should complement, not distract. Here are the classic pairings and why they work.
Blue cheese dip with buffalo wings: The funky, creamy quality of blue cheese cuts through the acidity and heat of buffalo sauce. Make your own by combining crumbled Stilton or Gorgonzola with soured cream, a squeeze of lemon, and a little salt.
Cooling yoghurt dip with spiced wings: Full-fat yoghurt with cucumber, mint, and a pinch of ground cumin. The cool, creamy quality provides relief against sustained chilli heat and also works as a textural contrast with crispy wings.
Tamarind chutney: Sweet, sour, and deeply flavoured, tamarind chutney works particularly well alongside wings cooked with South Asian spices. Available in most UK supermarkets in the World Food aisle.
Garlic butter: Melted butter with roasted garlic and a pinch of flaked salt. Simple, rich, and works with almost everything.
Serving and Eating: Getting It Right
A few final notes on presentation and eating, which matter more than people usually acknowledge.
Wings should be eaten immediately. The window between perfect and slightly-less-than-perfect is genuinely short — around ten to fifteen minutes after cooking. If you are cooking for a group, stagger your batches so that wings arrive in waves rather than all at once. A fresh batch of wings every twenty minutes keeps the meal interesting and ensures no one is eating cold wings.
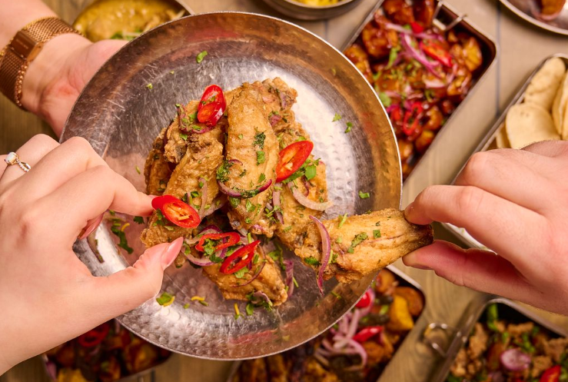
Provide plenty of napkins. This is not a caveat — it is part of the experience. Eating wings properly involves getting your hands involved, and the ritual of the paper napkin pile is part of what makes wings feel like a different kind of eating occasion from most meals.
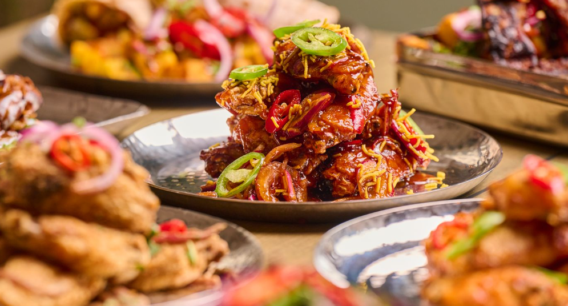
For a sharing table, put out a mix of flavours rather than a single preparation. The contrast between sticky and spiced, or between a dry rub and a glazed wing, makes the whole plate more interesting and gives everyone something to debate.
Common Mistakes to Avoid
- Not drying the wings before cooking, the single biggest cause of flabby skin
- Overcrowding the fryer, air fryer, or baking tray leads to steaming rather than crisping
- Using too low an oil temperature for frying creates greasy, pale wings
- Applying a wet glaze and not returning to the heat, the glaze will be sticky rather than set
- Cooking straight from the fridge: cold wings take longer and cook less evenly; allow 20 minutes at room temperature first
- Not tasting your rub or sauce before applying, adjust seasoning before it goes on the wings, not after
Want to try expertly made chicken wings without the washing up?
Mowgli Street Food has just launched three new wings — Sticky, Gunpowder, and Bengali Hot — at all 26 UK restaurants. Book your table